foryoueats
No results to search

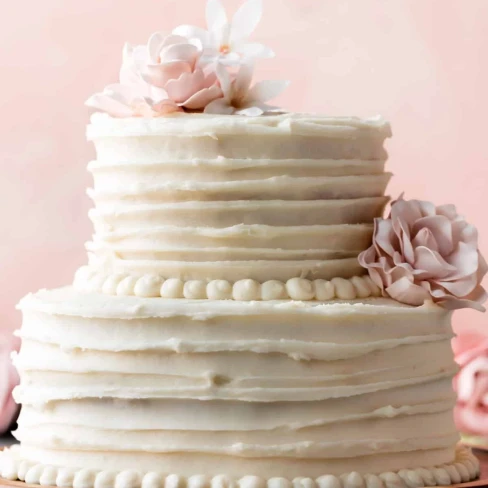
Simple Homemade Wedding Cake Recipe

Share
Email
Prep Time
5h
Cook Time
45m
Total Time
5h 45m
This simple homemade wedding cake recipe will result in a decadent and moist cake that will impress all of your guests. The layers are light and flavorful, and the frosting is perfectly sweet. It's the perfect cake for a special occasion.

Ingredients

Servings: 30
Scale:
Scale
0.25
0.5
1
2
3
4
5
6

9-inch Bottom Tier

6-inch Top Tier

Frosting For 9 Inch Cake & Piping

Frosting For 6 Inch Cake

Steps

1
Before beginning this recipe, watch the video tutorial above, read the entire blog post, read the recipe instructions, and review the recipe notes. Make sure you’re prepared with the recommended special tools, which are listed right above this recipe and in the recipe Notes section.
2
Preheat oven to 350°F (177°C). Grease three 9×2 inch round cake pans, line with parchment paper rounds, then grease the parchment paper. Parchment paper helps the cakes seamlessly release from the pans. (If it’s helpful, see this parchment paper rounds for cakes video & post.)
3
Whisk the cake flour, salt, baking powder, and baking soda together. Set aside. Using a handheld or stand mixer fitted with a paddle or whisk attachment, beat the butter and sugar together on high speed until smooth and creamy, about 3 minutes. Scrape down the sides and up the bottom of the bowl with a silicone spatula as needed. Beat in the 3 eggs, 2 egg whites, and vanilla extract on high speed until combined, about 2 minutes. (Mixture will look curdled as a result of the egg liquid and solid butter combining.) Beat in the sour cream. Scrape down the sides and up the bottom of the bowl as needed. With the mixer on low speed, add the dry ingredients until just incorporated. With the mixer still running on low, slowly pour in the milk until combined. Do not over-mix. Whisk it all by hand a few times to make sure there are no lumps at the bottom of the bowl. The batter will be slightly thick. You’ll have 8-9 cups of cake batter. Pour batter evenly into cake pans. Weigh them to ensure accuracy, if desired. Bake for around 23-26 minutes or until the cakes are baked through. To test for doneness, insert a toothpick into the center of the cake. If it comes out clean, it’s done. Allow cakes to cool completely in the pans set on a wire cooling rack. The cakes must be completely cool before frosting and assembling.
4
Keep the oven on.
5
prepare three 6×2 inch round cake pans just as you did with the 9-inch cake pans in step 2. (Greasing with parchment paper rounds.)
6
Prepare the 6-inch cake batter the same exact way as the bottom tier. You’ll have about 4 cups of cake batter. The batter will be thinner than the bottom tier’s cake batter. Pour batter evenly into cake pans. Weigh them to ensure accuracy, if desired. Bake for around 18-22 minutes or until the cakes are baked through. To test for doneness, insert a toothpick into the center of the cake. If it comes out clean, it’s done. Allow cakes to cool completely in the pans set on a wire rack. The cakes must be completely cool before frosting and assembling.
7
Using a large serrated knife, slice a thin layer off the tops of all the cakes to create a flat surface. This is called leveling off the cakes. Discard the leveled off piece (or crumble over ice cream!).
8
In a large bowl using a handheld mixer or stand mixer fitted with a paddle attachment, beat the butter on medium speed until creamy, about 2 minutes. Add confectioners’ sugar, milk, vanilla extract, and salt with the mixer running on low. Increase to high speed and beat for 2 minutes. Add more confectioners’ sugar if frosting is too thin, more milk if frosting is too thick, or an extra pinch of salt if frosting is too sweet.
9
You can prepare the rest of the frosting now (step 11), if desired, or begin decorating the 9-inch tier. Place your 9-10 inch cake board on your cake turner. Place 1 cake layer on your cake board. Using a large icing spatula, evenly cover the top with a scant 1 and 1/2 cups of frosting. Top with 2nd cake layer and evenly cover the top with a scant 1 and 1/2 cups of frosting. Top with the third cake layer. Using about 1-1 and 1/4 cups of frosting, spread it all over the top and sides in a thin layer, also called a crumb coat. A large icing spatula and bench scraper are helpful for applying the crumb coat. Set leftover frosting aside at room temperature. If you are decorating this cake in stages over 1-2 days, cover and refrigerate this leftover frosting.
10
Using the cake board to pick up the cake (be careful, it’s heavy), place the cake in the refrigerator to help set the crumb coat as you work on the top tier.
11
Make the frosting for the 6-inch cake, just as you prepared the 1st batch of frosting. (Step 8.) Before adding any salt, taste the frosting, then add a pinch if desired. I always add a small pinch.
12
Place your 6-inch cake board on your cake turner. Place 1 6-inch cake layer on your cake board. Using a small icing spatula, evenly cover the top with a scant 3/4 cup of frosting. Top with 2nd cake layer and evenly cover the top with a scant 3/4 cup of frosting. Top with the third cake layer. Using about 3/4 cup of frosting, spread it all over the top and sides in a thin layer, also called a crumb coat. A small icing spatula and bench scraper are helpful for applying the crumb coat. Set leftover frosting aside at room temperature. If you are decorating this cake in stages over 1-2 days, cover and refrigerate this leftover frosting.
13
Using the cake board to pick up the 6-inch cake, carefully place the cake in the refrigerator to help set the crumb coat as you work on the exterior frosting on the top tier.
14
Remove the bottom tier from the refrigerator (along with the cake board) and place on the cake turner. Apply the remaining frosting for the bottom tier on the cake, reserving about 6-8 Tablespoons for piping detail. I recommend a large icing spatula and bench scraper to apply the outer layer of frosting. For the decorative textured frosting as pictured, see my video above. As shown in the video, use a small icing spatula and run it around the cake while spinning with the cake turner. You will love this look because it’s very easy, but resembles beautiful ruffles. Carefully lift the cake (with the cake board) and place on your serving platter or cake stand.
15
Wash and dry 4 cake dowels. Measure the height of the bottom cake. Measure and cut the cake dowels to match. Staying within a 6 inch circle diameter (you can use another 6 inch cake board to “imprint” a 6-inch circle in the very center of the top of the 9-inch cake), insert the dowels into the cake, spacing them about 2 inches apart to form 4 corners of a square. Push the dowels straight down until each touches the bottom cake board. Set aside.
16
Remove the top tier from the refrigerator (along with the cake board) and place on the cake turner. Decorate just as you did the bottom tier, including the ruffled textured frosting. I also turn the cake on the cake turner and apply this ruffled look on top of the 6-inch cake, too. This is optional. Along with the cake board, carefully lift the small cake and gently place it in the very center of the bottom tier.
17
After placing the small tier on top, you can pipe leftover frosting around the bottom of it. This covers up any spaces or smears that may have appeared when arranging the top tier. I pipe dots of frosting with Wilton piping tip #12 between the tiers as well as around the bottom of the whole cake. They resemble pretty pearls. To smooth down pointy peaks on these “pearls,” moisten your fingertip with water and gently press down on the peak.
18
Add any decorative pieces, such as artificial flowers.
19
Refrigerate cake until ready to serve. After a few hours, the frosting will “set” and you can lightly cover with plastic wrap.
20
Cover any leftover cake tightly and refrigerate for up to 1 week.

Nutrition Facts

  • Calories
    828kcal
    41%
  • Fat
    36g
    1%
  • Saturated Fat
    22g
    1%
  • Carbohydrates
    128g
    6%
  • Fiber
    1g
    0%
  • Sugar
    93g
    4%
  • Protein
    6g
    0%
  • Cholesterol
    121mg
    6%
  • Sodium
    176mg
    8%
Percent Daily Values are based on a 2,000 calorie diet.
Getting Started
Create Recipe