foryoueats
No results to search

Perfect Meringue Mushrooms Recipe

Share
Email
Prep Time
-
Cook Time
-
Total Time
7h
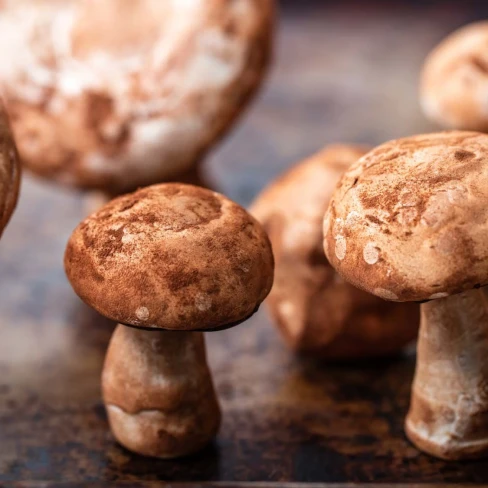
This perfect meringue mushrooms recipe creates delicate, airy meringues that are shaped and decorated to resemble adorable little mushrooms. With just a handful of ingredients and a little creativity, you can delight your guests with these whimsical and delicious treats.
Perfect Meringue Mushrooms Recipe Image
Recipe Options

Ingredients

Servings: 24
Scale:
Scale
0.25
0.5
1
2
3
4
5
6

Steps

1
Getting Ready: Adjust oven racks to upper-middle and lower-middle positions, and preheat the oven to 225°F (110°C). Line 2 half-sheet pans with parchment, and fit 2 large pastry bags with plain, round tips (we recommend using one 1/2-inch round tip and one 1/4-inch round tip to create mushroom caps and stems, both large and small). Twist the tip so the narrow end of the bag twists closed, then tuck a bit of the bag into the tip to "seal" so the meringue won't flow out prematurely. Slide each prepared pastry bag into a large pilsner glass (or a similarly tall, narrow container), and roll the opening of the bag over the rim of the glass, so it stands open and easy to fill.
2
For a Stand Mixer With a Bowl-Lift Design: Tear off a long strip of foil and crumple it into a thick ring. Place it in the bottom of a 3-quart saucier, or similarly large, wide pot, and fill with roughly 1 1/2 inches water. Place over high heat until bubbling-hot, then adjust the temperature to maintain a gentle simmer. In a stainless steel stand mixer bowl, combine egg whites, toasted sugar, salt, and cream of tartar. Set over the steaming water so that the bowl is resting on the foil ring and touching neither the water nor the pot itself. Cook, stirring and scraping constantly with a flexible spatula, until egg whites register 175°F (79°C) on a digital thermometer; this should take no longer than 8 to 10 minutes. Transfer bowl to a stand mixer fitted with a whisk attachment.
3
For a Stand Mixer With a Tilt-Head Design: Fill a large pot with a few inches of water. Place over high heat until bubbling-hot. In a large heatproof glass or ceramic bowl, combine egg whites, toasted sugar, salt, and cream of tartar. Set bowl over the steaming water, then cook, stirring and scraping constantly with a flexible spatula, until egg whites register 175°F (79°C) on a digital thermometer; this should take no longer than 10 minutes. Scrape mixture into the stand mixer bowl and fit stand mixer with a whisk attachment.
4
Preparing the Meringue: Whip the meringue on high speed until glossy, stiff, and thick, about 5 minutes (the timing can vary substantially depending on the equipment involved, so use the textural cues as your primary guide). When well-whipped, reduce speed to medium-low and add vanilla extract. Adjust salt and vanilla to taste, bearing in mind the meringue will taste less sweet once it has baked. Transfer the meringue to the prepared piping bags and have a small dish of water nearby.
5
For the Mushroom Caps: Hold the piping bag perpendicular to the parchment-lined sheet pan, with the piping tip about 1/4- to 1/2-inch above its surface. For flat, shiitake-like mushrooms, don't lift or move the bag whatsoever, simply squeeze firmly so the meringue is piped out in a disc-like shape; be sure to stop squeezing before moving the tip away when finished (a quick, lateral move left or right will make a clean break). For rounder, button mushroom–like shapes, slowly lift the piping bag while squeezing, then stop squeezing before moving the tip away. Repeat until the tray is filled with "caps" in assorted sizes and shapes, leaving at least 1/2-inch between each cap.
6
Dip your index finger in the dish of water, then smooth and flatten the pointed peak of each cap, re-wetting your fingertip between each one. This process may create wrinkles and folds in the meringue, and residual moisture can result in water spots, contributing to a more organic appearance in the finished mushroom.
7
For Mushroom Stems: Hold the piping bag perpendicular to the parchment-lined sheet pan, with the piping tip about 1/4-inch above its surface. Begin squeezing out the meringue, while slowly lifting the bag straight up; when the stem has reached the desired length, stop squeezing and lift the bag straight up until the meringue breaks away. Stems in assorted widths and heights can be created by varying the speed of piping and lifting. If you like, the stems can be piped at slight angles, or with a slightly spiraled effect, to create a wider array of shapes. Repeat until the tray is filled with "stems," leaving at least 1/2-inch between each one. As with the caps, the mushroom stems can be molded, adjusted, or smoothed with a wet fingertip. Don't worry if any stems fall over or lean to one side or show water spots, as all of these "defects" will give the finished mushrooms a more organic appearance.
8
Baking the Meringues: Place both trays of meringue in the oven. Bake until the caps and stems feel dry to the touch and peel easily from the parchment when lifted away, although a firm squeeze may reveal their interior texture to still be quite soft. This slow-bake should take about 3 hours but can vary depending on the accuracy of the oven as well as the exact number and size of the mushroom pieces. In ovens with uneven heat, rotate the sheet pans and switch their positions about halfway through. At the end of baking, the meringues will have taken on a light ivory to beige color.
9
Shut off the heat and allow the meringues to cool to inside the oven until they reach cool room temperature, no warmer than 70°F (21°C). The timing will vary depending on the oven's age and design, but expect between 3 to 5 hours; cooling can also be done overnight. In either case, should the meringues still feel tacky and soft after cooling, return the oven temperature to 225°F and bake another hour, before cooling to room temperature once more.
10
Coloring the Meringues: Once the meringues have cooled, lightly dust each tray with a high-fat cocoa powder, whether natural or Dutch. Next, use your fingers to rub the cocoa powder into the caps and stems, until each has darkened to a rustic brown. Repeat as needed or as desired to achieve whatever coloration you like. As a rule, the mushrooms tend to look more realistic when the caps are darker than the stems. Cover the caps and stems tightly with plastic or transfer to an airtight container, until needed, up to one week at cool room temperature. Please bear in mind that if the container is not truly airtight, the meringues may turn soft and tacky over time.
11
Assembling the Mushrooms : Temper the chocolate according to whichever method you prefer (see our complete guide to tempering ). Spread a small quantity of tempered chocolate onto the bottom of a mushroom cap, then dip the very tip of a mushroom stem into the chocolate as well, and join the pieces together, gently twisting the stem against the cap to secure. Arrange the assembled mushroom upside down on the empty baking sheet, pressing the stem firmly into the cap if it seems unstable.
12
Continue until all the mushrooms have been assembled; if needed, stems that jut out at odd angles can be balanced against the rim of the baking sheet or against the cap or stem of another mushroom. Don't worry if the stems shift or lean slightly to one side, as this will only give the mushrooms a more natural appearance in the end, but do re-adjust any stems that fall over altogether.
13
When the chocolate has hardened, transfer the mushrooms to an airtight container until needed (the mushrooms can be held up to 1 week at cool room temperature). As the mushrooms will soften over time in a humid environment, it's best to keep them in the container as long as possible, bringing them out to garnish a Yule log at the last possible moment, rather than in advance. How long the mushrooms will stay crisp and dry will vary depending on relative humidity. In dry conditions, they may keep well for several hours; in humid environments (particular in a kitchen with a stovetop in use for boiling or simmering), they may begin to soften in less than an hour.
14
Troubleshooting: While the approximate cooking times for the water bath are estimations and will naturally vary from kitchen to kitchen, substantially missing the mark in terms of timing indicates heat levels that are vastly too high or low. When the meringue cooks much too fast, it is prone to scrambling, regardless of how thoroughly the bowl is scraped, resulting in a lumpy texture and eggy flavor. When the meringue is cooked too slowly, excess evaporation will dry the meringue, making it grainy and dense. In either event, adjusting the heat as needed will prevent the issue from arising in the first place. Chocolate that has been melted but not tempered (or chocolate that has been badly tempered) may fail to set at room temperature. In this case, cover the tray of assembled mushrooms in plastic, and refrigerate until the chocolate hardens. Transfer to an airtight container, and refrigerate until needed (up to one week).

Nutrition Facts

  • Calories
    35kcal
    1%
  • Fat
    0g
    0%
  • Saturated Fat
    0g
    0%
  • Carbohydrates
    6g
    0%
  • Fiber
    0g
    0%
  • Sugar
    5g
    0%
  • Protein
    1g
    0%
  • Cholesterol
    0mg
    0%
  • Sodium
    30mg
    1%
Percent Daily Values are based on a 2,000 calorie diet.
Getting Started
Create Recipe